Teil 8a: Anwendungen zur Deployment Workbench hinzufügen

Nachdem ich den OSD Build Share erstellt habe, gehe ich die Deployment Workbench von oben nach unten durch. Zuerst werde ich Anwendungen zur Deployment Workbench hinzufügen. Vorbereitet habe ich die Software im Teil Standard Software vorbereiten und Die Installation von Microsoft Office anpassen.

Microsoft Office 2013 Pro Plus zur Deployment Workbench hinzufügen

  1. Als Administrator an MDT1 anmelden
  2. Deployment Workbench starten
  3. OSD Build Share erweitern
  4. Applications rechts anklicken > New Folder
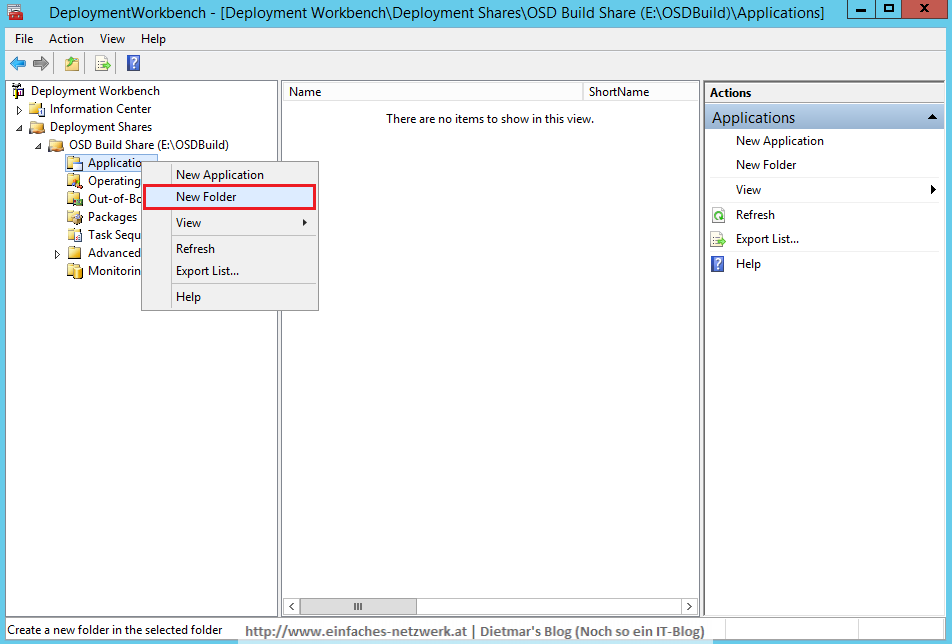
    APPLICATIONS-001
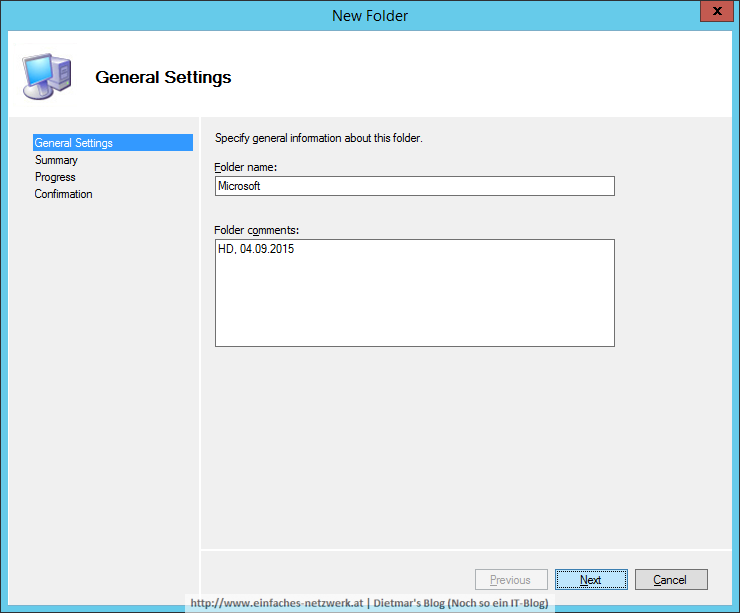
  5. New Folder
    1. General Settings
      1. Folder name: Microsoft
      2. Folder comments: HD, 04.09.2015 > Next
        APPLICATIONS-002
    2. Summary > Next
    3. Confirmation > Finish
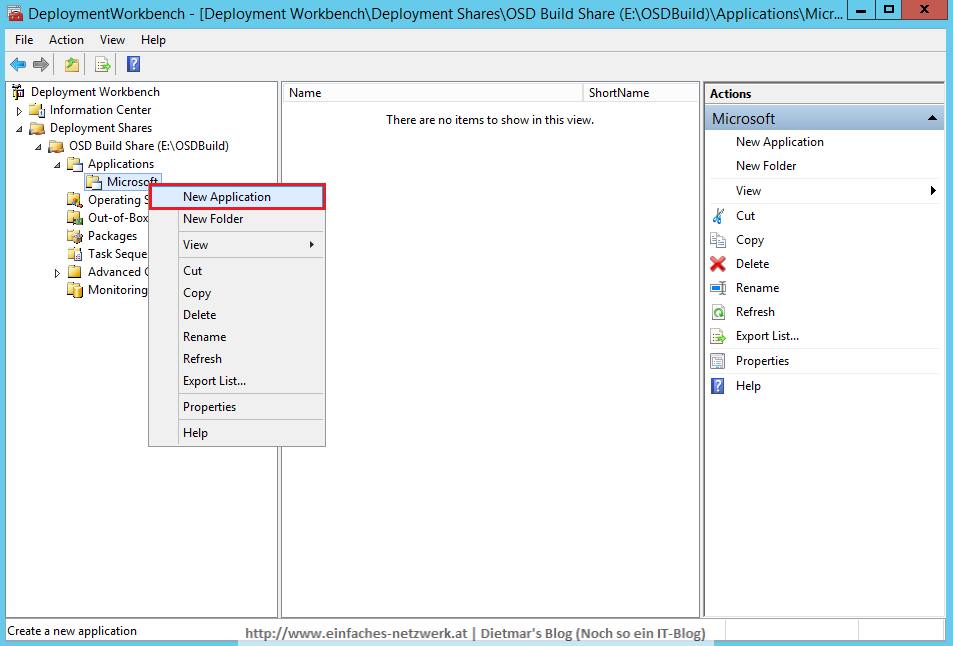
  6. Den Ordner Microsoft rechts anklicken > New Application
    APPLICATIONS-003
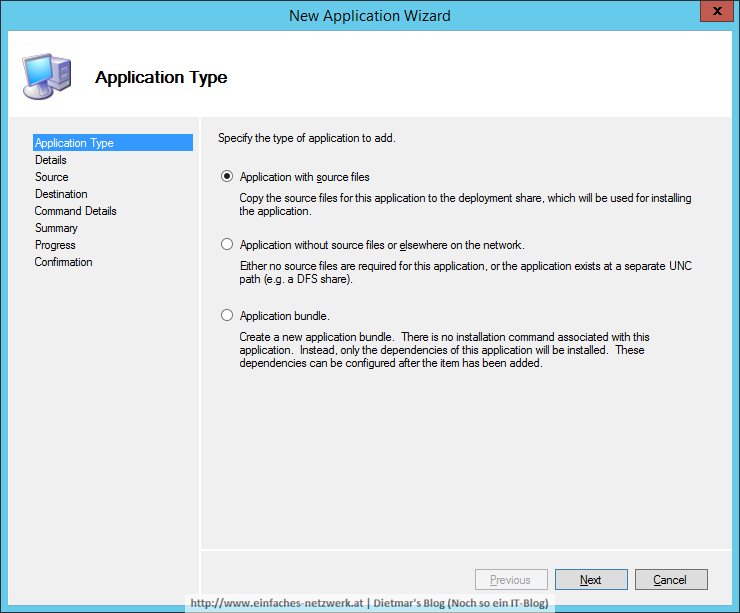
  7. New Application Wizard
    1. Applcation type: Application with source files > Next
      APPLICATIONS-004
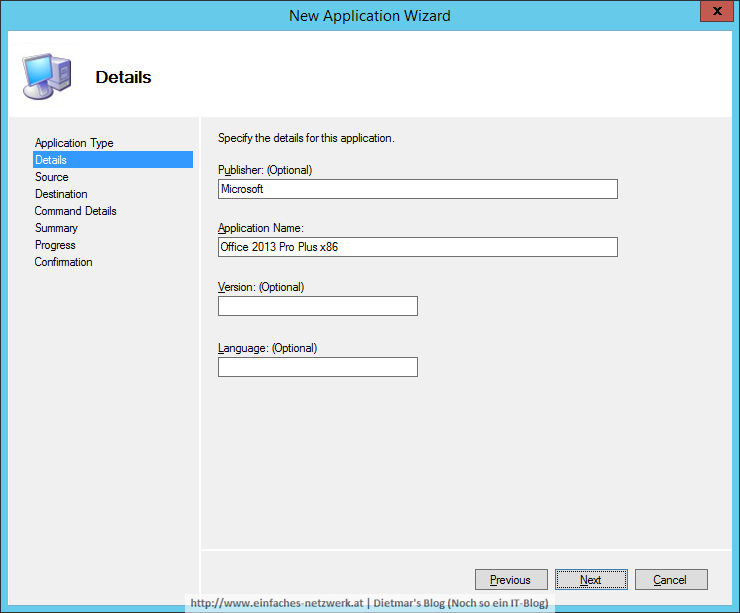
    2. Details
      1. Publisher: Microsoft
      2. Application name: Office 2013 Pro Plus x86 > Next
        APPLICATIONS-005
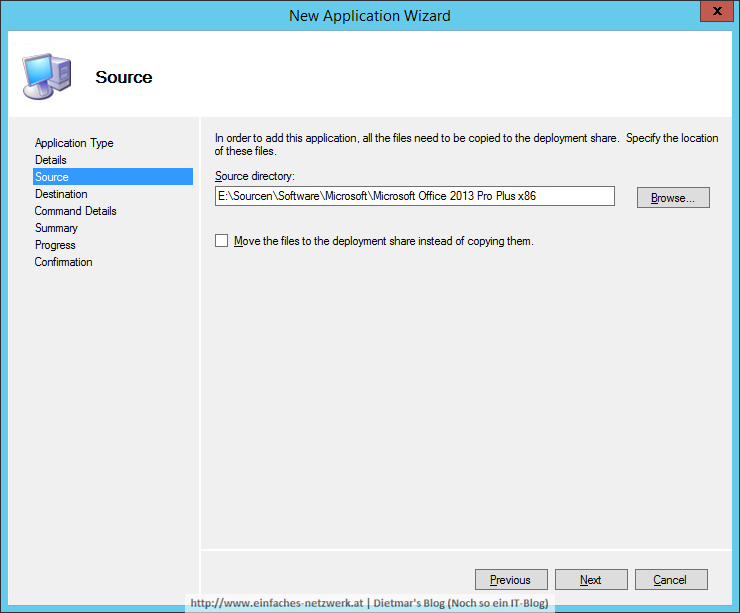
    3. Source
      1. Source directory: E:\Sourcen\Software\Microsoft\Microsoft Office 2013 Pro Plus x86 > Next
        APPLICATIONS-006
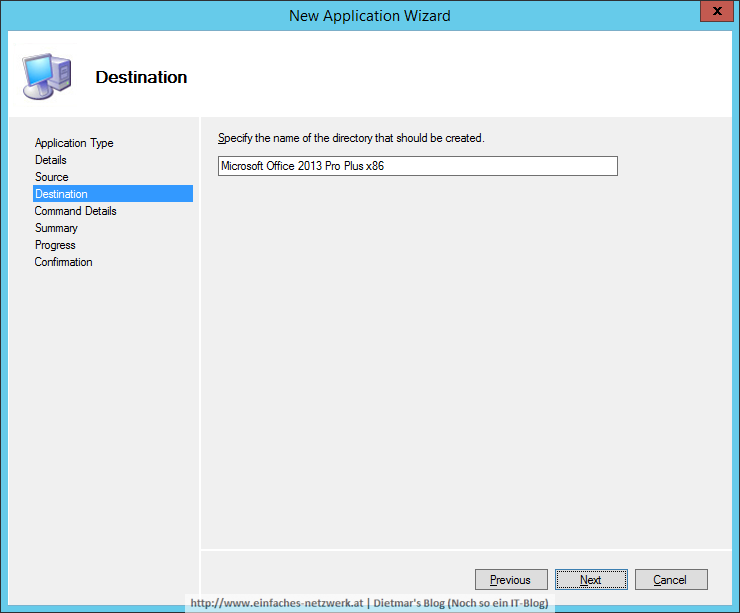
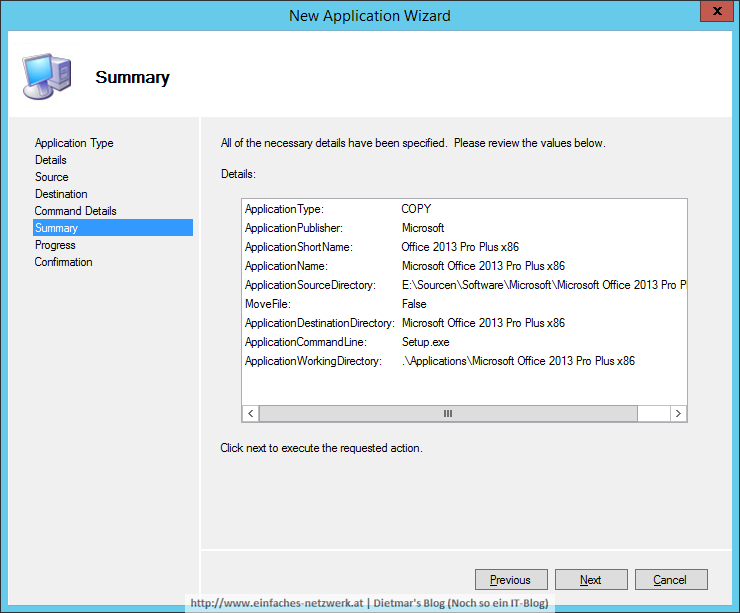
    4. Destination: Microsoft Office 2013 Pro Plus x86 > Next
      APPLICATIONS-007
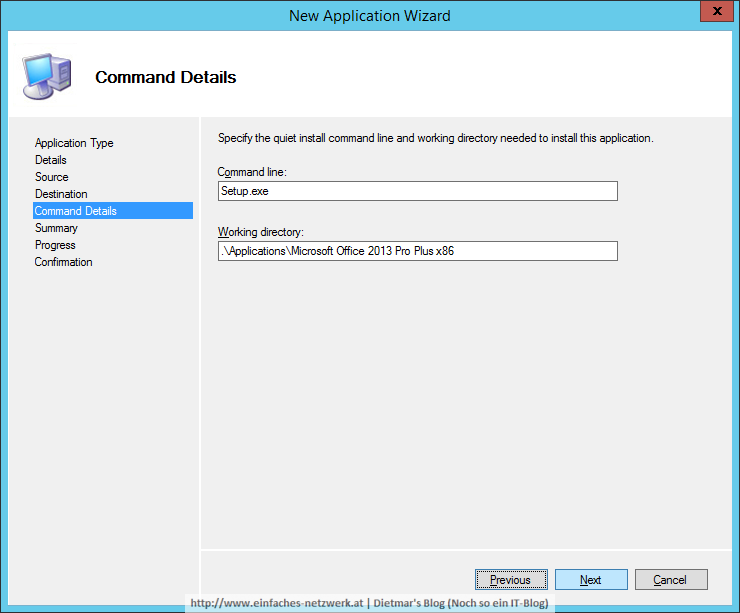
    5. Command Details
      1. Command line: Setup.exe > Next
        APPLICATIONS-008
    6. Summary > Next
      APPLICATIONS-009
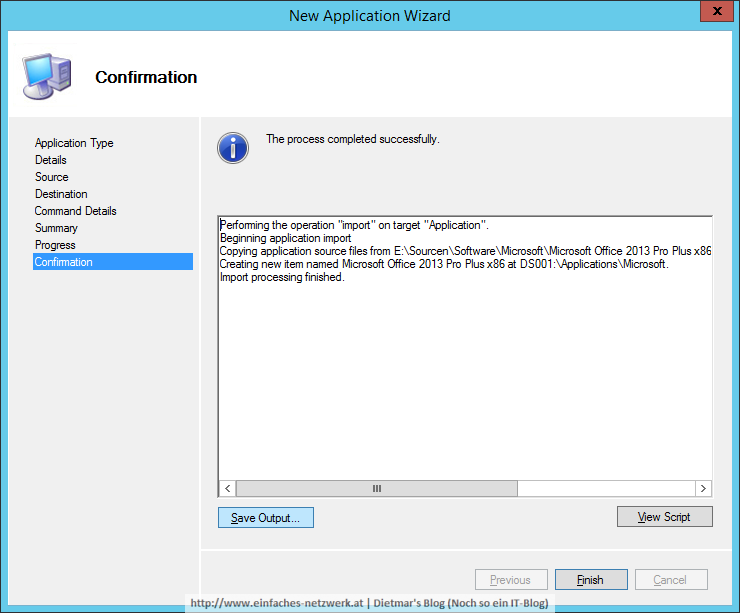
    7. Confirmation > Finish
      APPLICATIONS-010

Weitere Anwendungen zur Deployment Workbench hinzufügen

  1. Microsoft RSAT for Windows 10
    1. Applcation type: Application with source files
    2. Publisher: Microsoft
    3. Application name: RSAT for Windows 10 x64
    4. Source directory: E:\Sourcen\Software\Microsoft\Microsoft RSAT for Windows 10 x64
    5. Destination: Microsoft RSAT for Windows 10 x64
    6. Command line: install.exe
  2. Microsoft Silverlight 5.1 x64
    1. Applcation type: Application with source files
    2. Publisher: Microsoft
    3. Application name: Silverlight 5.1 x64
    4. Source directory: E:\Sourcen\Software\Microsoft\Microsoft Silverlight 5.1 x64
    5. Destination: Microsoft Silverlight 5.1 x64
    6. Command line: install.exe
  3. Microsoft Visual C++ 2005 SP1 x86 x64
    1. Applcation type: Application with source files
    2. Publisher: Microsoft
    3. Application name: Visual C++ 2005 SP1 x86 x64
    4. Source directory: E:\Sourcen\Software\Microsoft\Microsoft Visual C++ 2005 SP1 x86 x64
    5. Destination: Microsoft Visual C++ 2005 SP1 x86 x64
    6. Command line: install.exe
  4. Microsoft Visual C++ 2008 SP1 x86 x64
    1. Applcation type: Application with source files
    2. Publisher: Microsoft
    3. Application name: Visual C++ 2008 SP1 x86 x64
    4. Source directory: E:\Sourcen\Software\Microsoft\Microsoft Visual C++ 2008 SP1 x86 x64
    5. Destination: Microsoft Visual C++ 2008 SP1 x86 x64
    6. Command line: install.exe
  5. Microsoft Visual C++ 2010 SP1 x86 x64
    1. Applcation type: Application with source files
    2. Publisher: Microsoft
    3. Application name: Visual C++ 2010 SP1 x86 x64
    4. Source directory: E:\Sourcen\Software\Microsoft\Microsoft Visual C++ 2010 SP1 x86 x64
    5. Destination: Microsoft Visual C++ 2010 SP1 x86 x64
    6. Command line: install.exe
  6. Microsoft Visual C++ 2012 x86 x64
    1. Applcation type: Application with source files
    2. Publisher: Microsoft
    3. Application name: Visual C++ 2012 x86 x64
    4. Source directory: E:\Sourcen\Software\Microsoft\Microsoft Visual C++ 2012 x86 x64
    5. Destination: Microsoft Visual C++ 2012 x86 x64
    6. Command line: install.exe
  7. Microsoft Visual C++ 2013 x86 x64
    1. Applcation type: Application with source files
    2. Publisher: Microsoft
    3. Application name: Visual C++ 2013 x86 x64
    4. Source directory: E:\Sourcen\Software\Microsoft\Microsoft Visual C++ 2013 x86 x64
    5. Destination: Microsoft Visual C++ 2013 x86 x64
    6. Command line: install.exe
  8. Microsoft Visual C++ 2015 x86 x64
    1. Applcation type: Application with source files
    2. Publisher: Microsoft
    3. Application name: Visual C++ 2015 x86 x64
    4. Source directory: E:\Sourcen\Software\Microsoft\Microsoft Visual C++ 2015 x86 x64
    5. Destination: Microsoft Visual C++ 2015 x86 x64
    6. Command line: install.exe
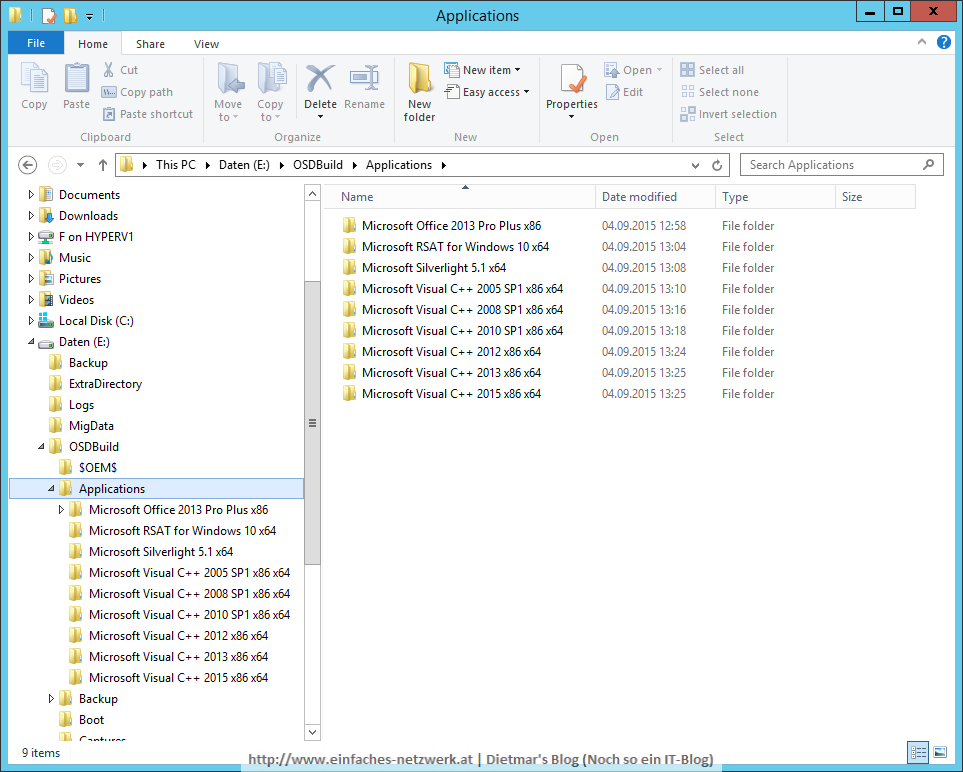
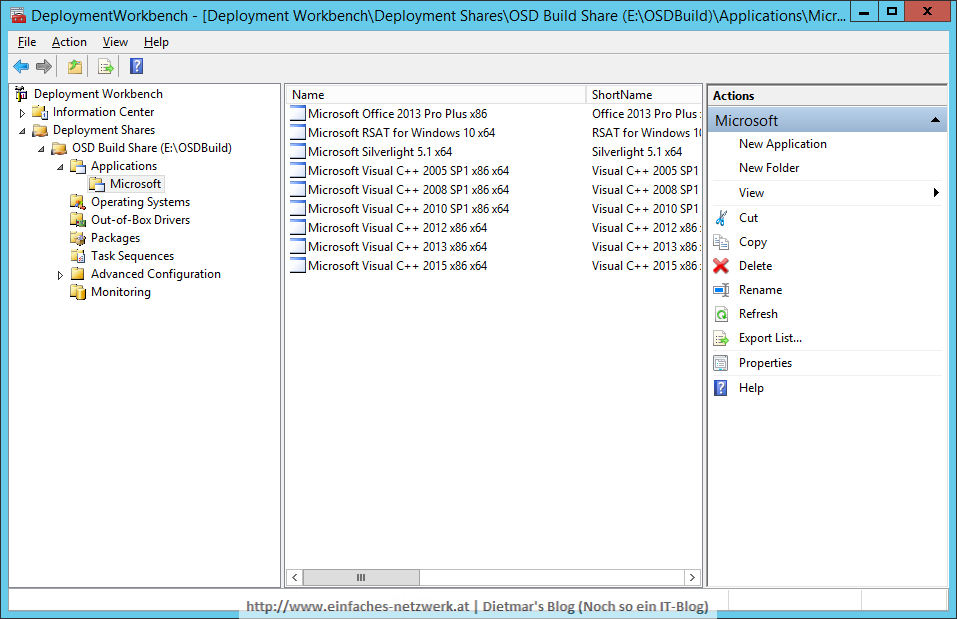
  9. Applications in der Deplyoment Workbench
    APPLICATIONS-014
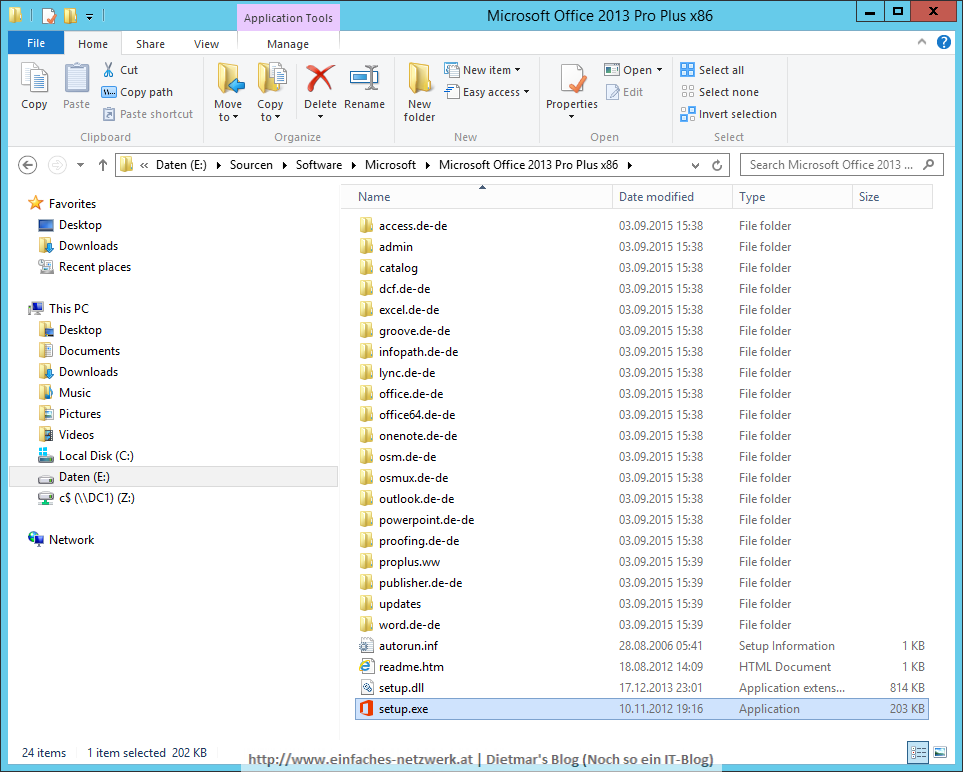
  10. Applications im Datei-Explorer
    APPLICATIONS-015

Teil 8: OSDBuild Deployment Share erstellen

In diesem Teil werde ich mit der Deployment Workbench (MDT) den OSDBuild Deployment Share erstellen und das Dienstkonto OSD_Build berechtigen, die Images im Ordner Captures erstellen zu können. Installiert habe ich ADK und MDT im Teil Deployment Server MDT1 vorbereiten.

OSDBuild Deployment Share erstellen

  1. Als Administrator an MDT1 anmelden
  2. Die Deployment Workbench (MDT) starten
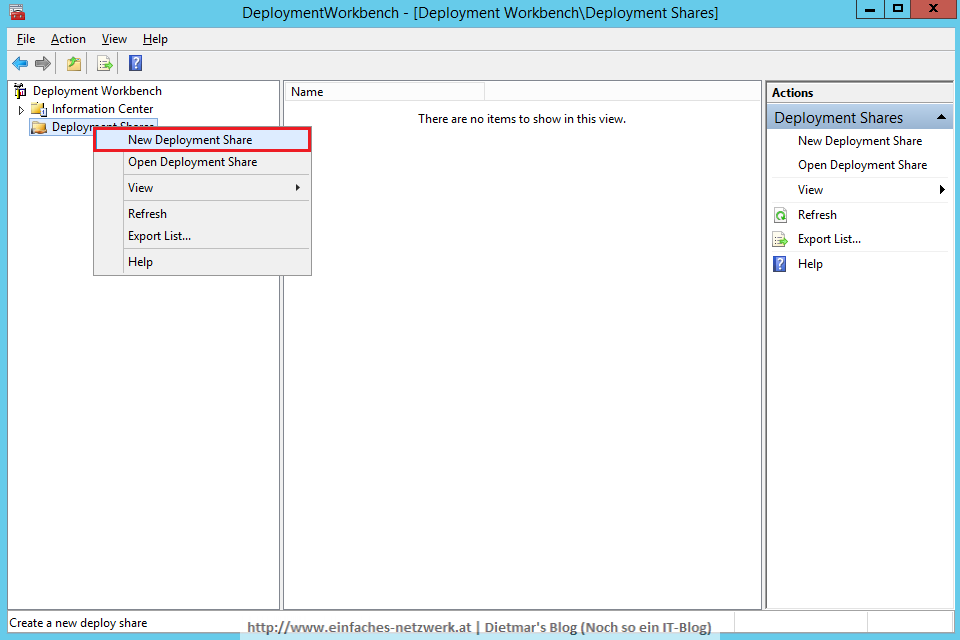
  3. Deployment Shares rechts anklicken > New Deployment Share
    OSD_BUILD-001
  4. New Deployment Share Wizard
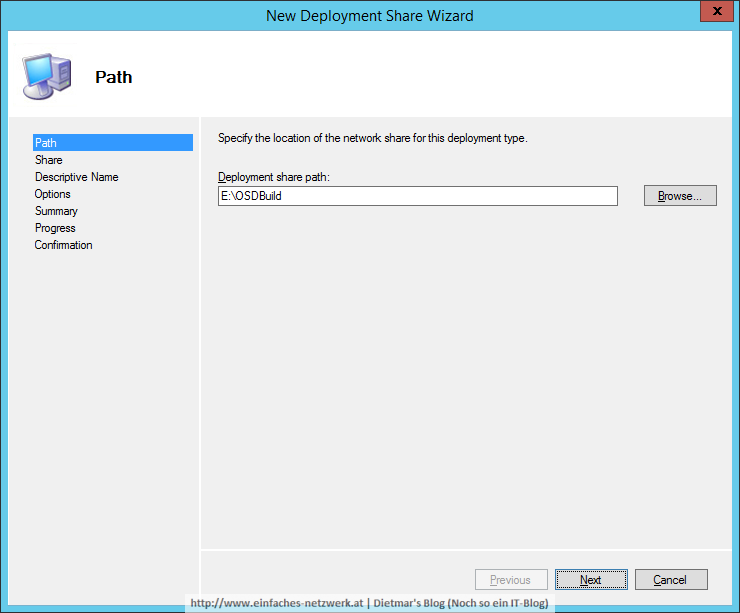
    1. Path
      1. Deployment share path: E:\OSDBuild > Next
        OSD_BUILD-002
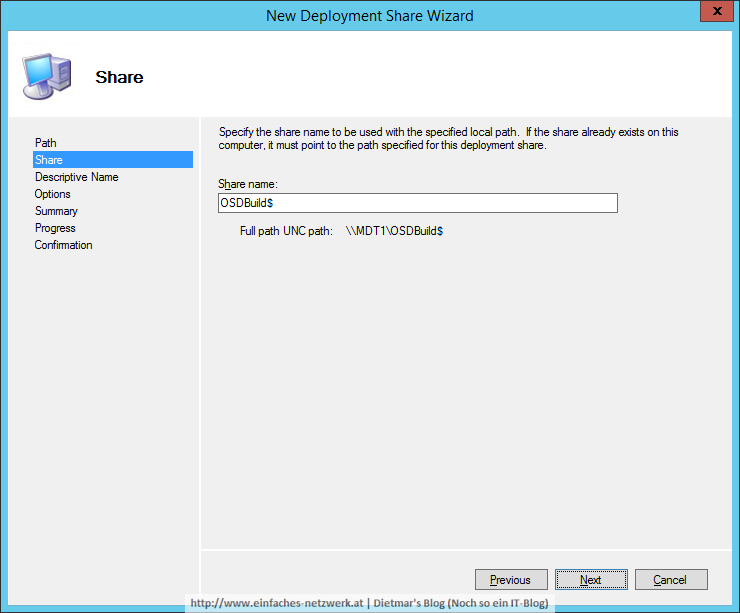
    2. Share
      1. Share name: OSDBuild$ > Next
        OSD_BUILD-003
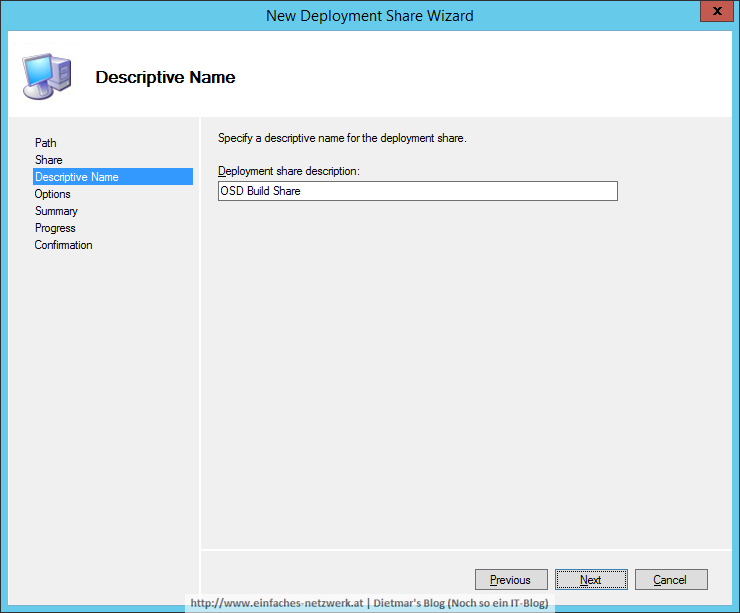
    3. Descriptive Name
      1. Deployment share description: OSD Build Share > Next
        OSD_BUILD-004
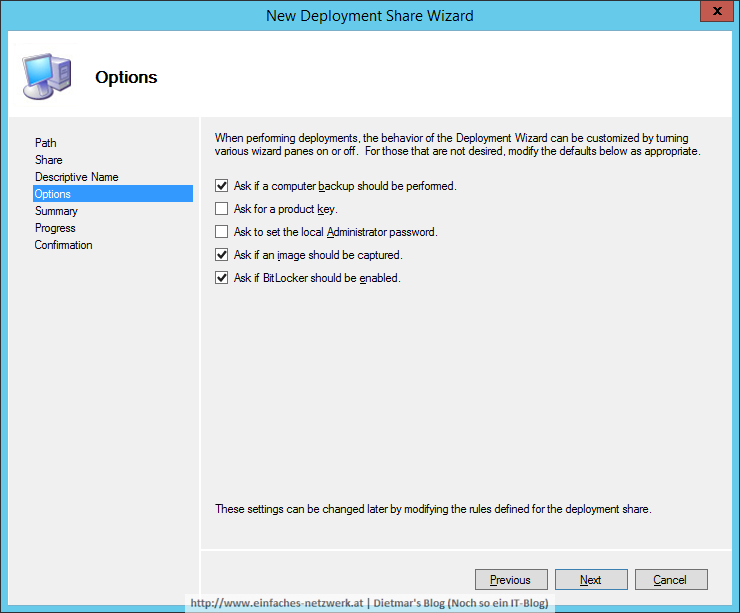
    4. Options > Next
      OSD_BUILD-005
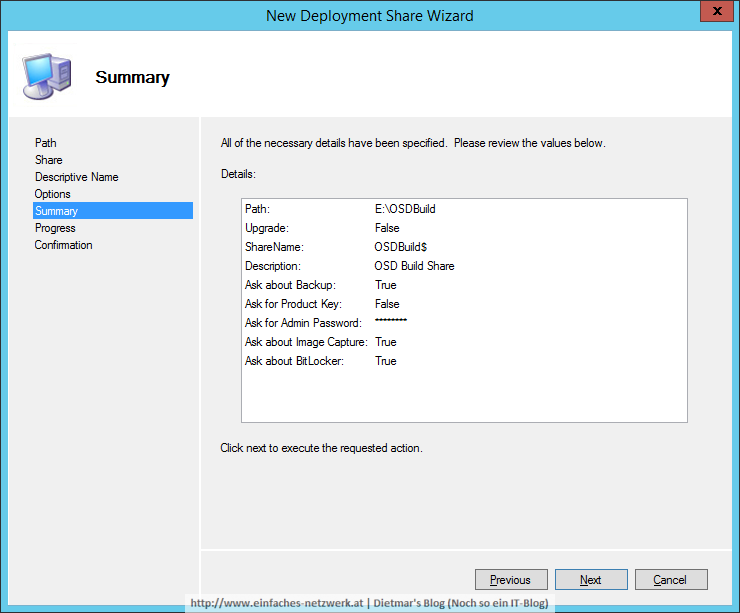
    5. Summary > Next
      OSD_BUILD-006
    6. Confirmation > Finish
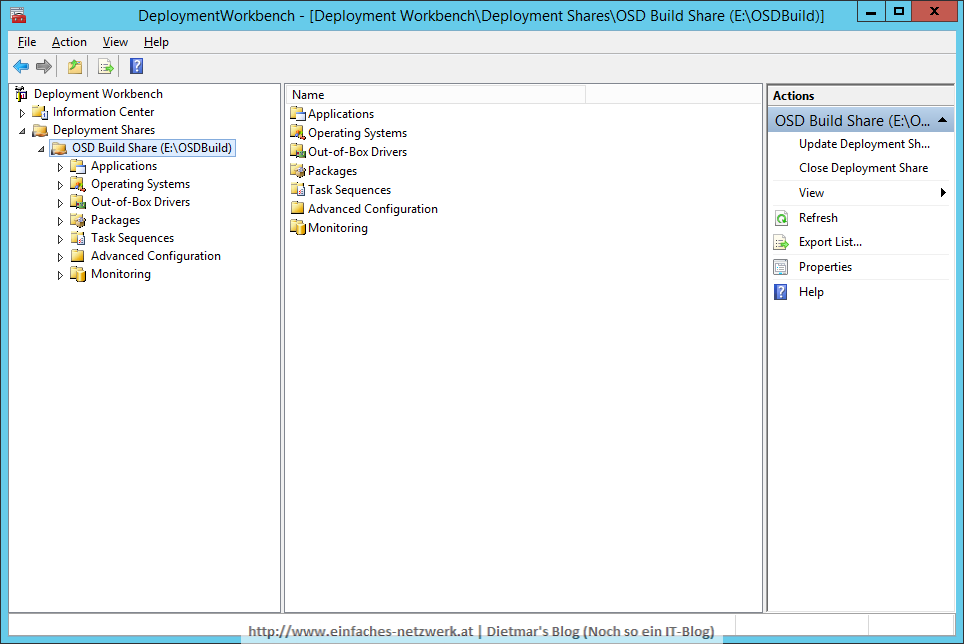
  5. OSDBuild Deployment Share in der Deployment Workbench
    OSD_BUILD-007
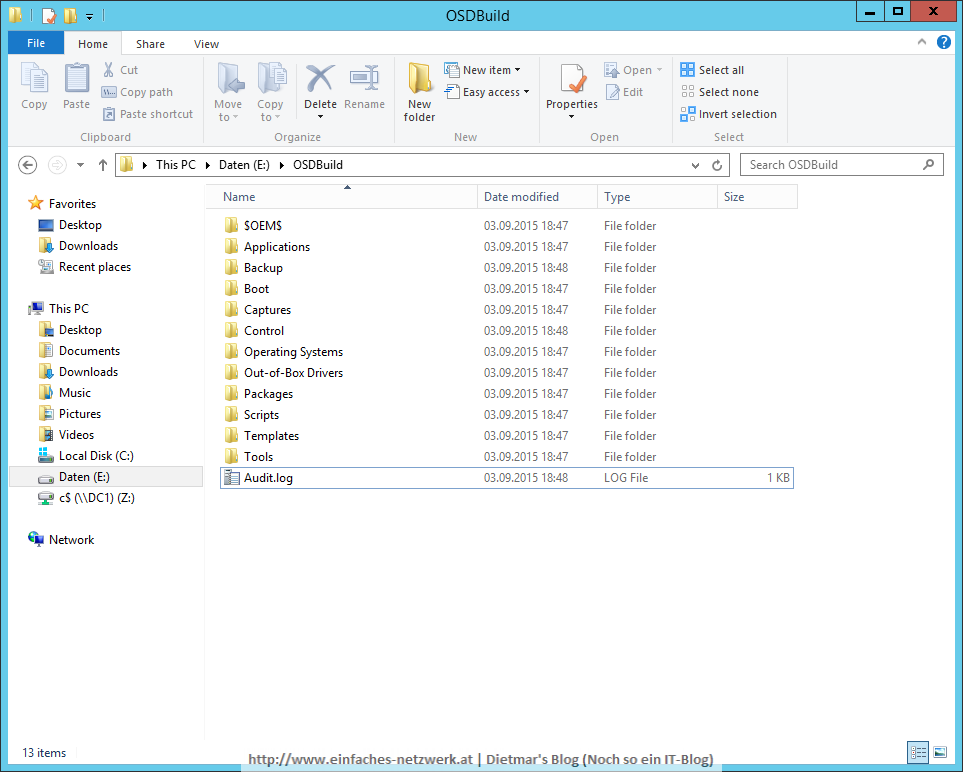
  6. OSDBuild Deployment Share im Datei-Explorer
    OSD_BUILD-008

Das Dienstkonto OSD_Build auf den Ordner Captures berechtigen

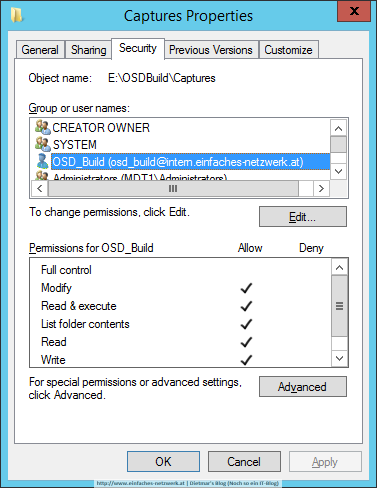
  1. Das Dienstkonto OSD_Build auf den Ordner E:\OSDBuild\Captures berechtigen
    1. NTFS-Berechtigungen: OSD_Build > Ändern
      OSD_BUILD-009

In den nächsten Teilen füge ich Schritt für Schritt Inhalte zum OSDBuild Deployment Share hinzu.

Teil 7e: Exkurs – Die Installation von Microsoft Office anpassen

In diesem Teil werde ich die Installation von Microsoft Office anpassen. Dafür wird das Microsoft Office-Anpassungstool verwendet. Ziel ist eine Installation

  • automatisiert ohne Anzeige
  • ohne Neustart
  • ohne dem Bestätigungs-Assistenten beim ersten Start
  • ohne die Animationen und Videos beim ersten Start
  • ohne OneDrive for Business und Lync
  • mit einer zusätzlichen Desktop-Vernüpfung für Outlook

Den Inhalt der Microsoft Office 2013-DVD kopieren

  1. Als Administrator an MDT1 anmelden
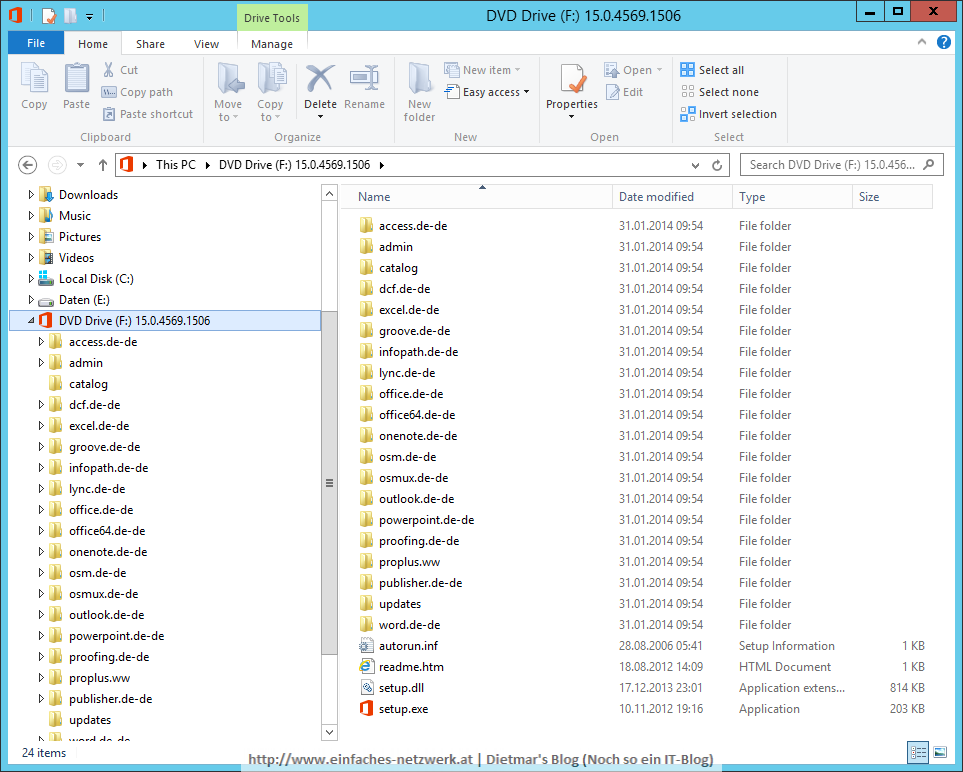
  2. Die Microsft Office 2013 Pro Plus-ISO-Datei mounten
    OFFICE-001
  3. Command Prompt (Admin) starten
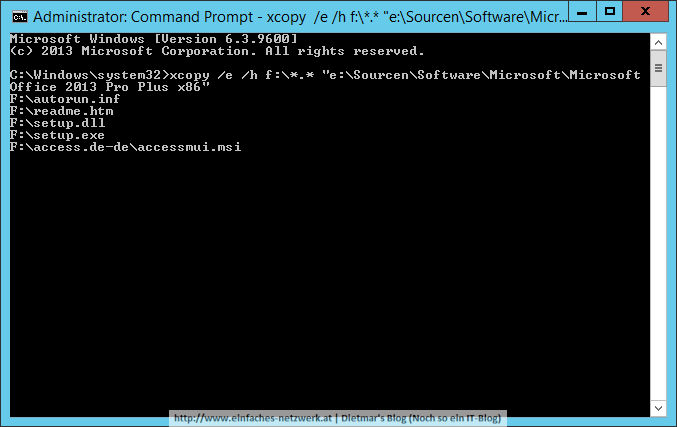
  4. Mit folgendem Befehl den Inhalt der DVD nach E:\Sourcen\Software\Microsoft\Microsoft Office 2013 Pro Plus x86 kopieren
    xcopy /e /h f:\*.* "e:\Sourcen\Software\Microsoft\Microsoft Office 2013 Pro Plus x86"

    OFFICE-002
    OFFICE-003

Die Installation von Microsoft Office anpassen

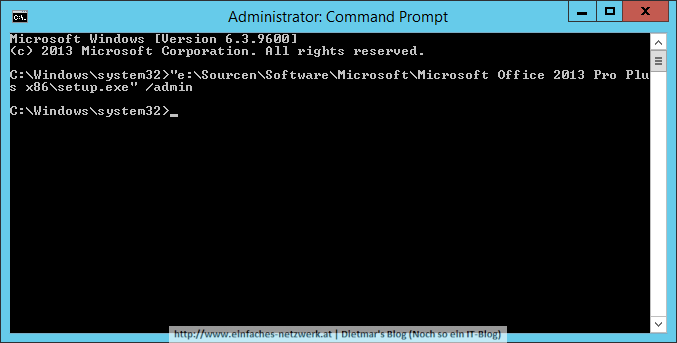
  1. Mit folgendem Befehl das Office-Anpassungstool starten
    "e:\Sourcen\Software\Microsoft\Microsoft Office 2013 Pro Plus x86\setup.exe" /admin

    OFFICE-004

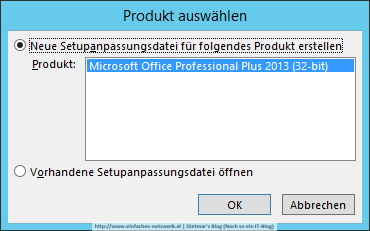
  2. Produkt auswählen
    1. Neue Setupanpassungsdatei erstellen > OK
      OFFICE-005
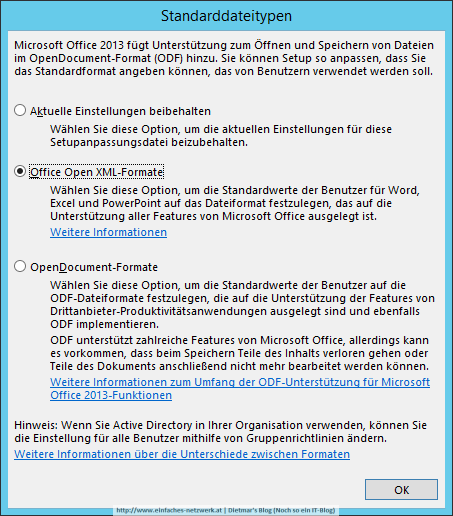
  3. Standarddateitypen
    1. Office Open XML-Formate > OK
      OFFICE-006
  4. Folgende Einstellungen konfigurieren:
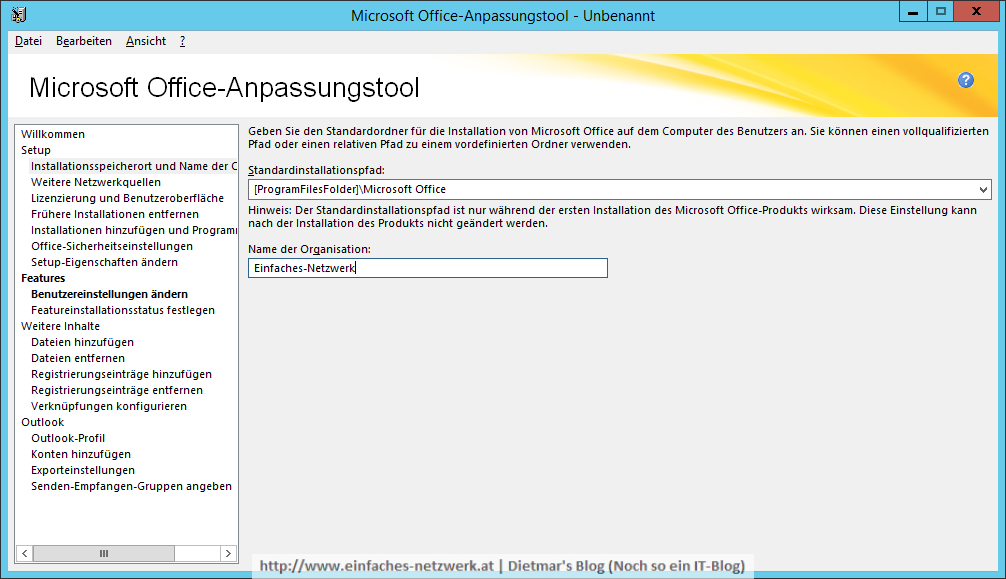
    1. Installationsspeicherort und Name der Organisation
      OFFICE-007
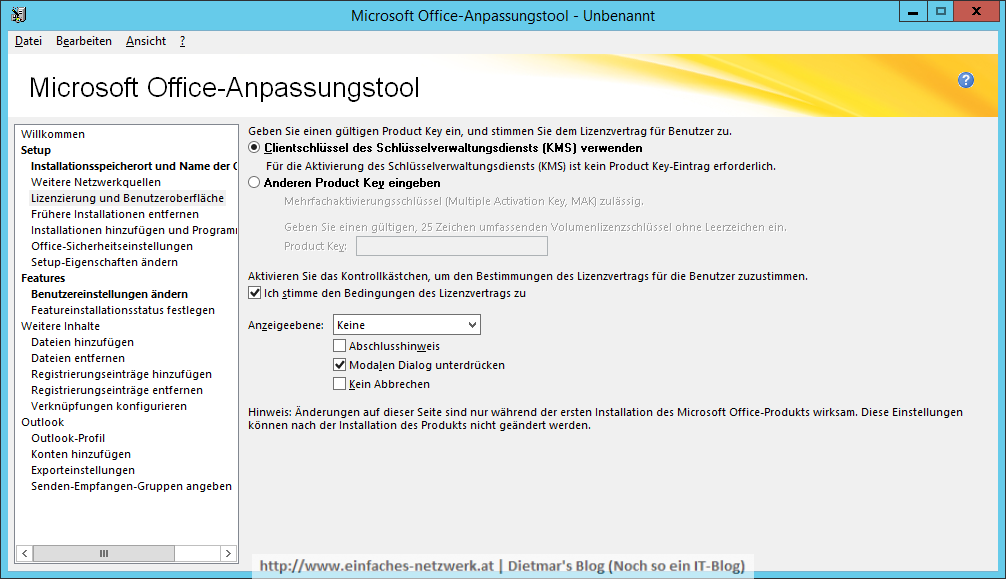
    2. Lizenzierung und Benutzeroberfläche
      OFFICE-008
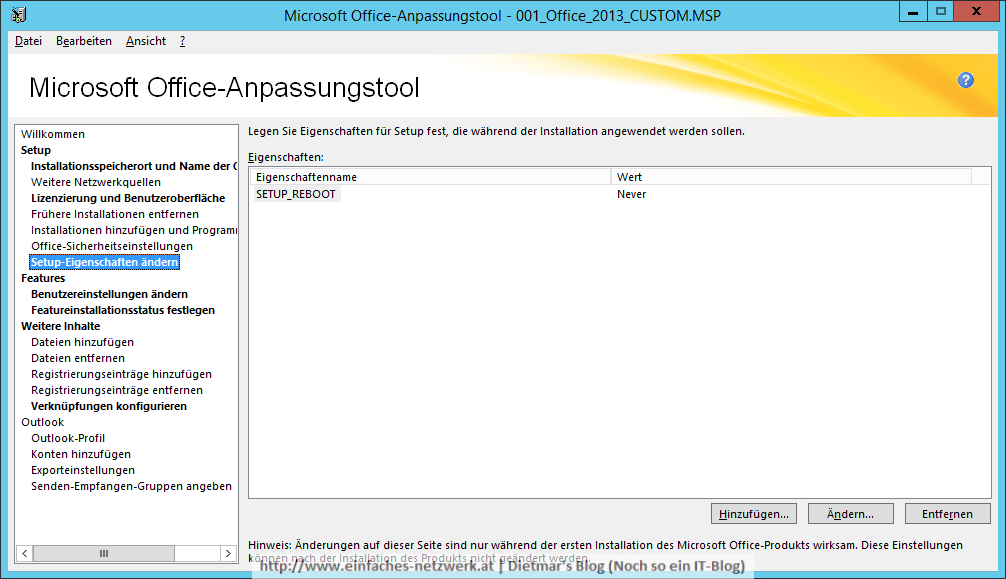
    3. Setup-Eigenschaften ändern
      OFFICE-015
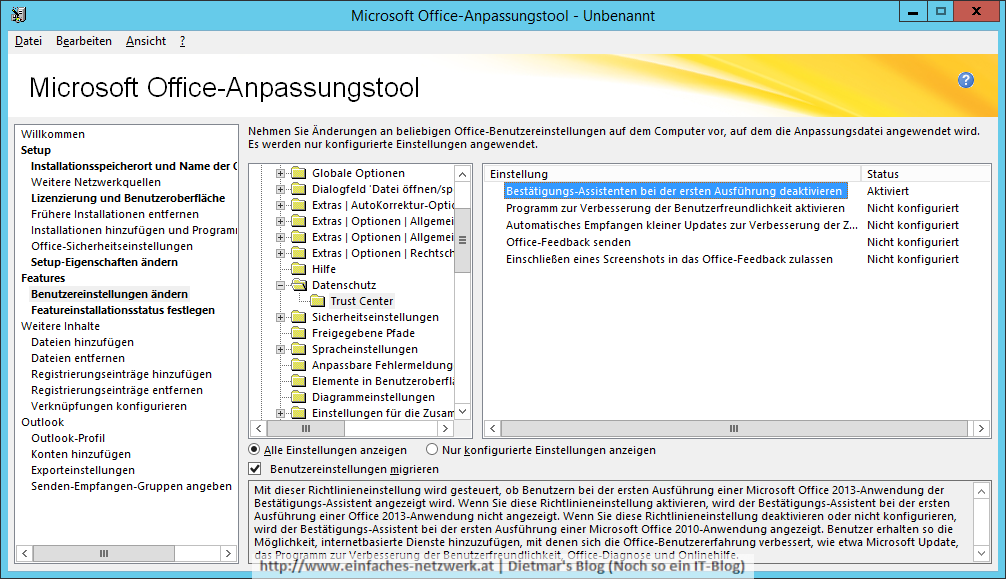
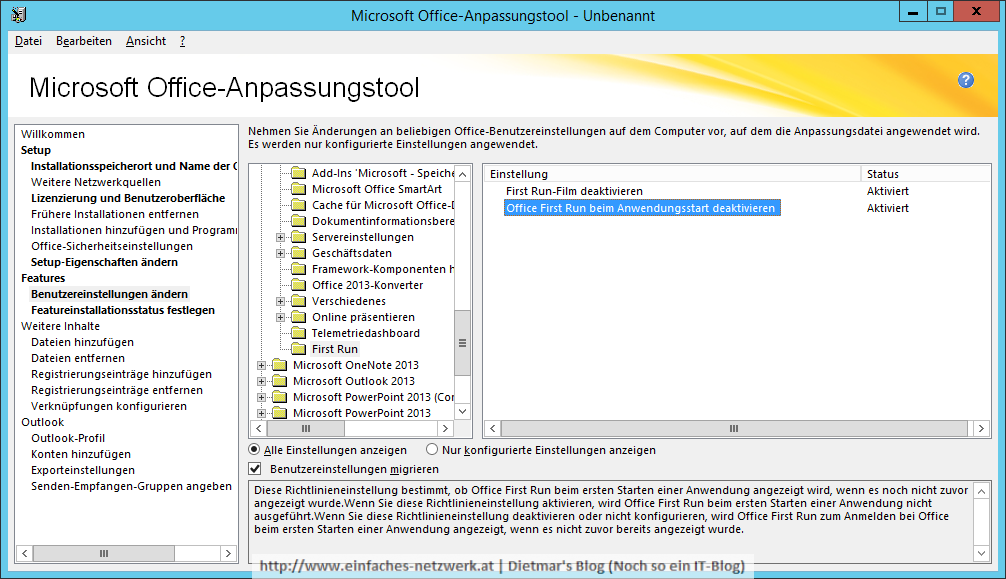
    4. Benutzereinstellungen ändern
      1. Microsoft Office 2013\Datenschutz\Trust Center
        OFFICE-010
      2. Microsoft Office 2013\First Run
        OFFICE-011
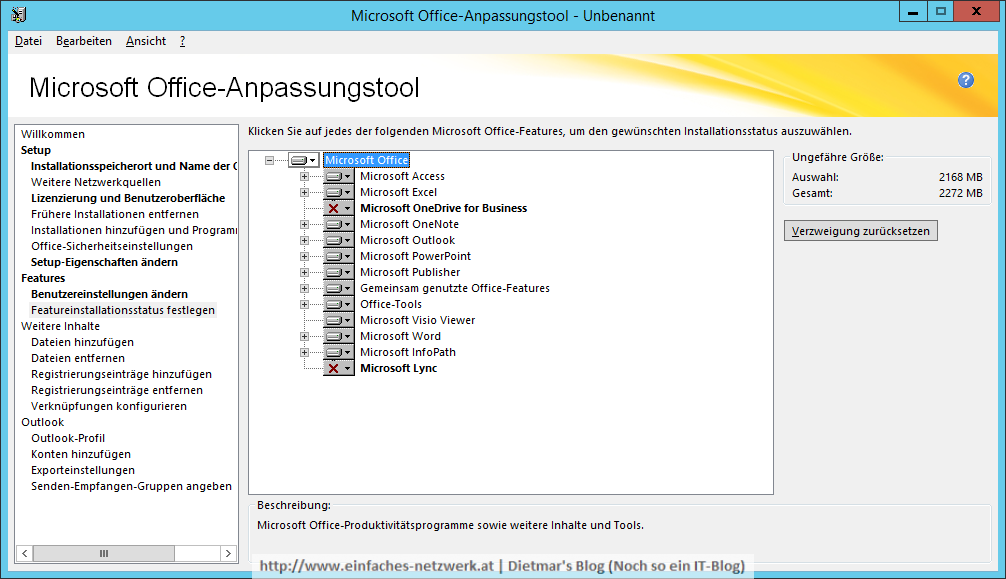
    5. Featureinstallationsstatus festlegen: OneDrive for Business und Lync deaktivieren
      OFFICE-009
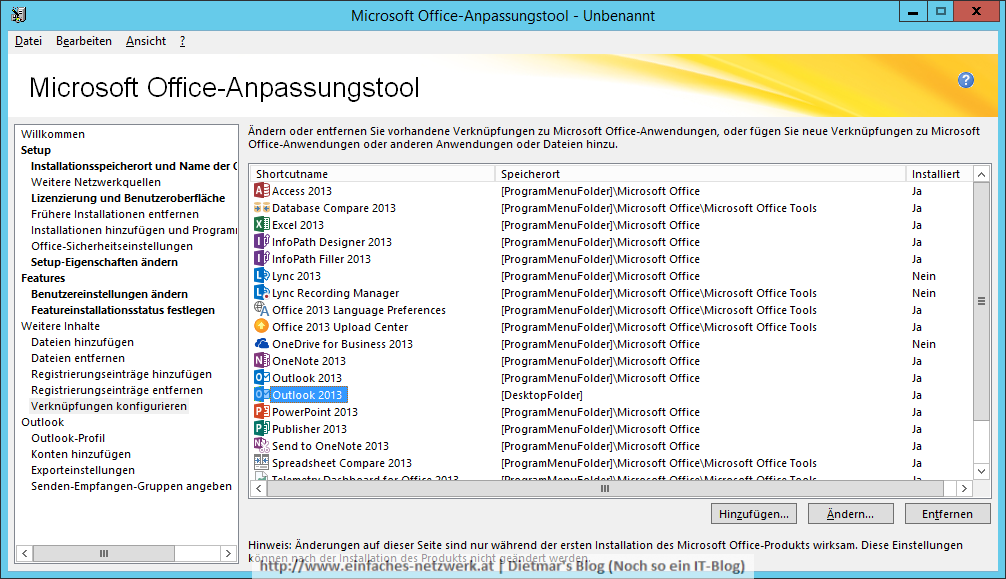
    6. Verknüpfungen konfigurieren > Hinzufügen…
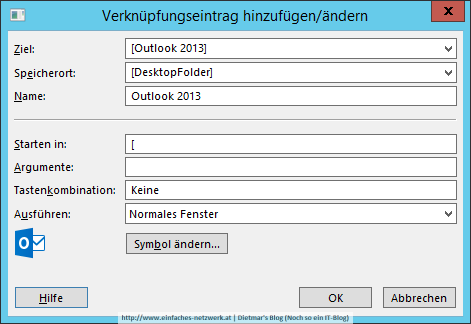
      1. Verknüpfungseintrag hinzufügen/ändern > OK
        OFFICE-012
        OFFICE-013
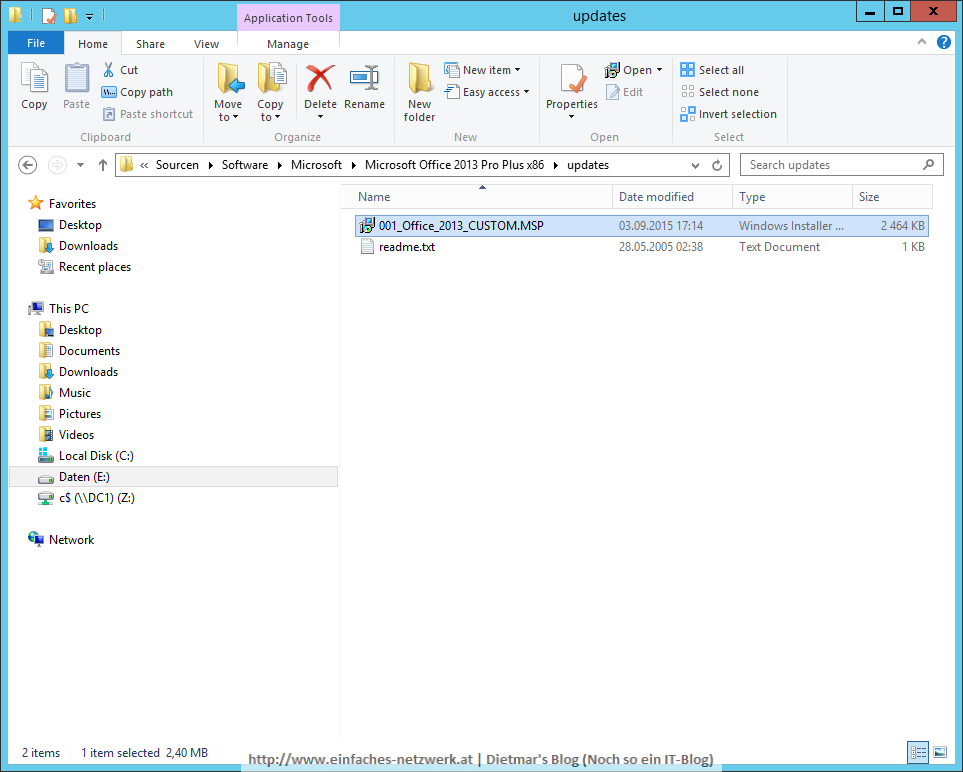
  5. Datei > Speichern > E:\Sourcen\Software\Microsoft\Microsoft Office 2013 Pro Plus x86\updates\001_Office_2013_CUSTOM.MSP
    OFFICE-014
  6. Alle Fenster schließen

Weitere Informationen