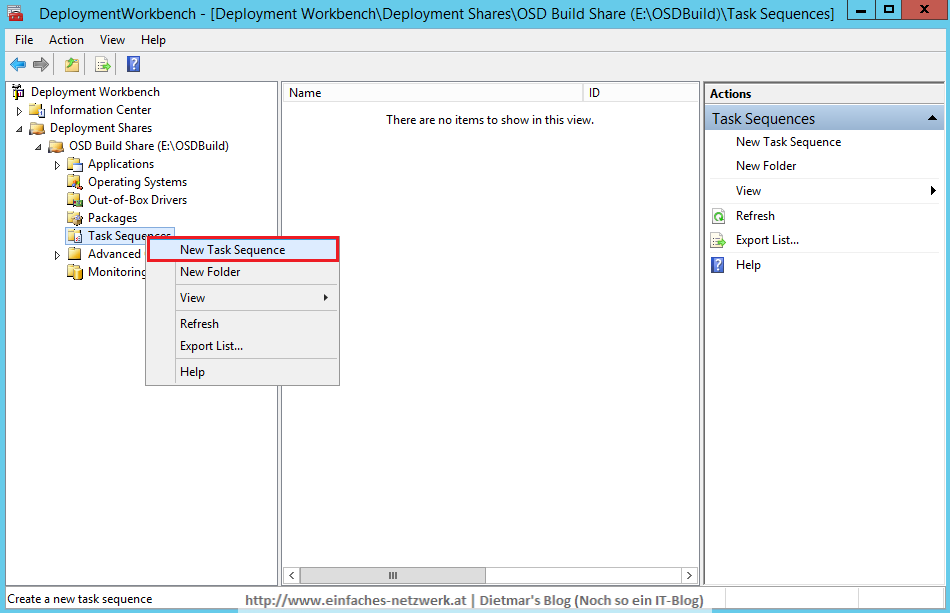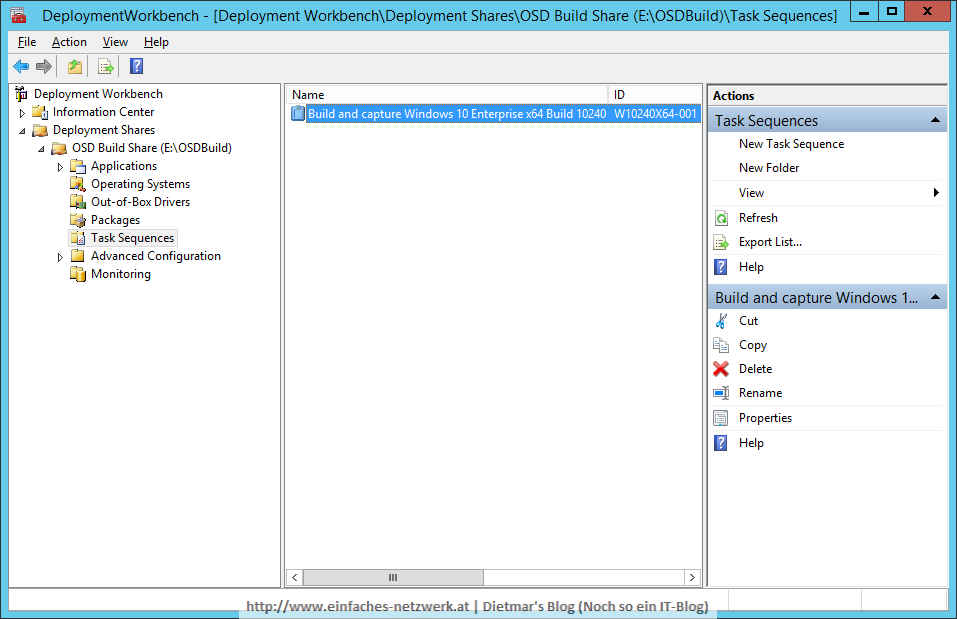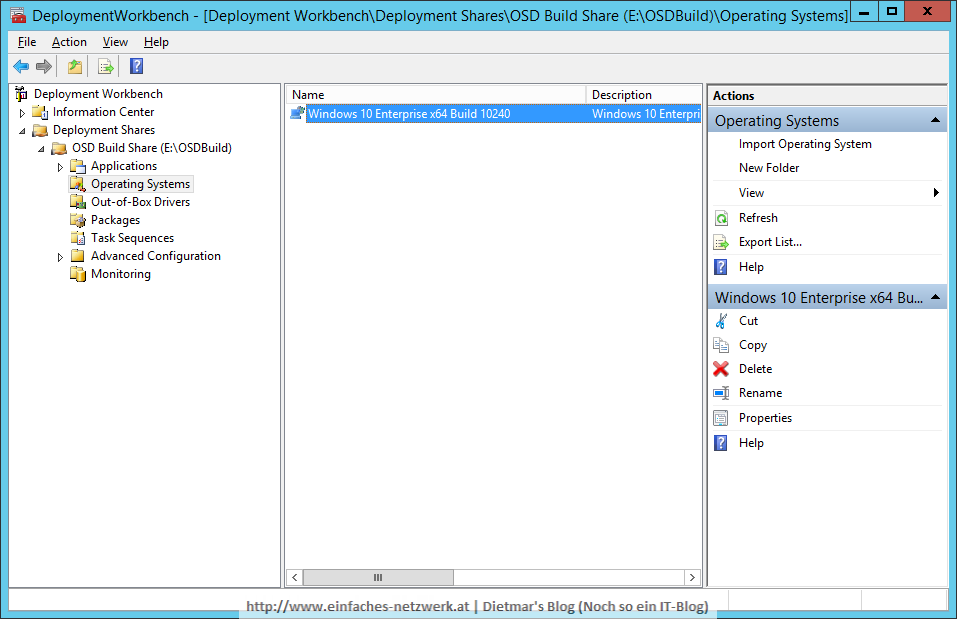
In diesem Teil werde ich die Task Sequence konfigurieren (siehe Task Sequence zur Deployment Workbench hinzufügen). Folgende Schritte werde ich dabei durchführen:
- Eine Gruppe zur Task Sequence hinzufügen
- Roles and features zu Windows 10 hinzufügen
- Die Standard Software (siehe Anwendungen zur Deployment Workbench hinzufügen)zur Task Sequence hinzufügen
- Den Computer während der Task Sequence neu starten
- Bestehende Tasks bearbeiten (aktivieren)
- Eine Befehlszeile ausführen
Die Task Sequence konfigurieren
- Task Sequence Build and capture Windows 10 Enterprise x64 Build 10240 rechts anklicken > Properties

- Auf den Reiter Task Sequence wechseln
- Den Bereich State Restore erweitern
- Windows Update (Pre-Application Installation) markieren > Add > New Group
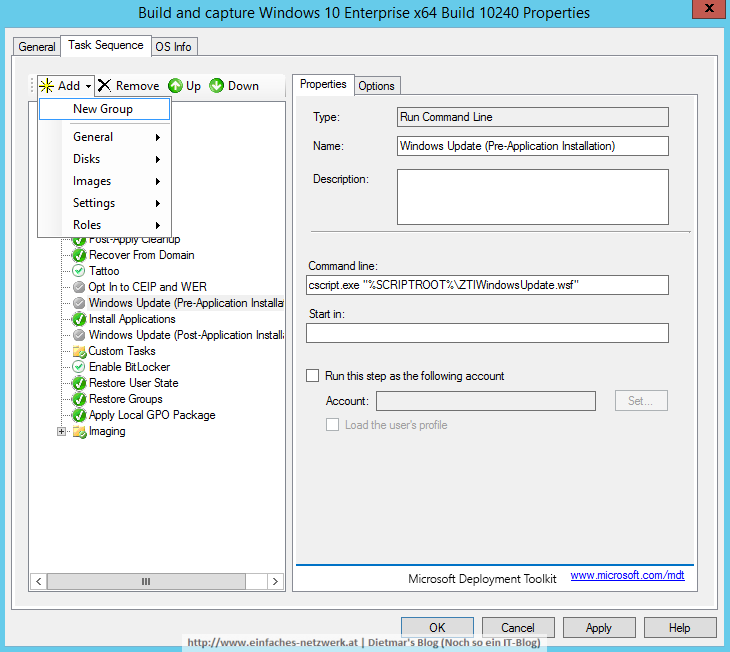
- New Group
- Name: Standard Software > Apply
- Zum Aktualisieren der Ansicht auf einen anderen Schritt (z.B. Install Applications) klicken
- Standard Software markieren > Add > Roles > Install Roles and Features
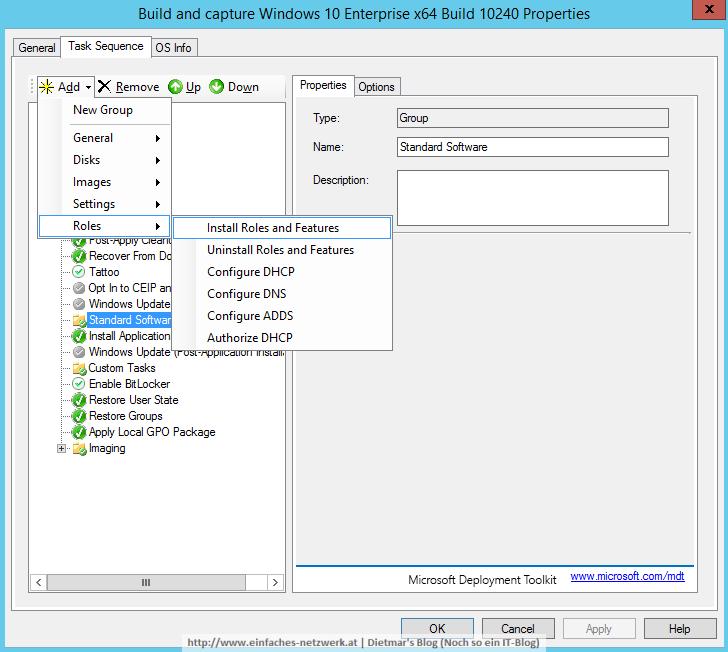
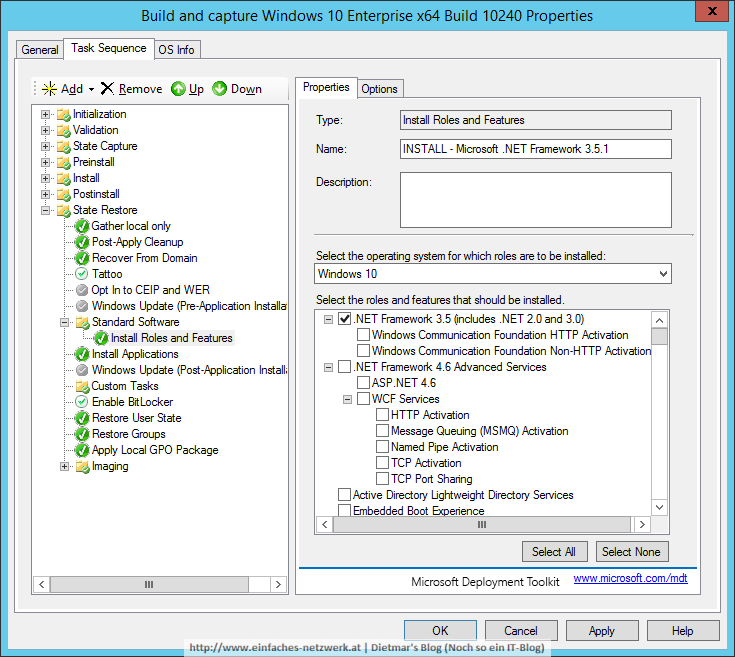
- Install Roles and Features
- Name: INSTALL – Microsoft .NET Framework 3.5.1
- Select the operating system for which roles are to be installed: Windows 10
- Select the roles and features that should be installed:
- .NET Framework 3.5
- Telnet Client > Apply
- INSTALL – Microsoft .NET Framework 3.5.1 markieren > Add > General > Install Application
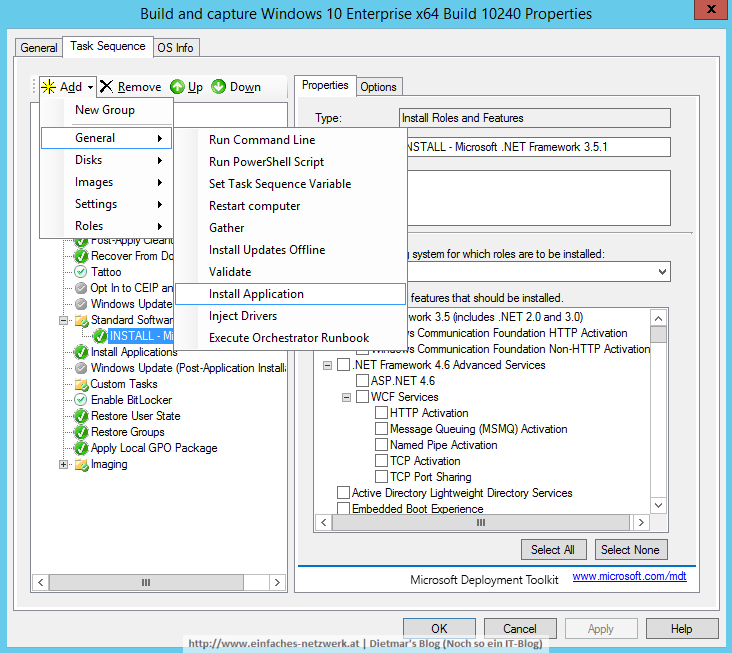
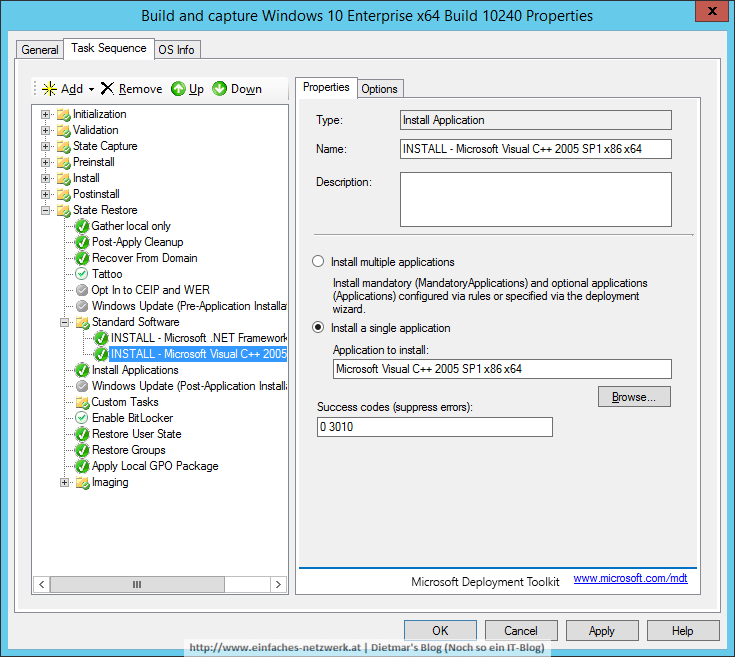
- Install Application
- Name: INSTALL – Microsoft C++ 2005 SP1 x86 x64
- Install a single application
- Application to install: Browse… > Microsoft Visual C++ 2005 SP1 x86 x64 > OK > Apply
- Application to install: Browse… > Microsoft Visual C++ 2005 SP1 x86 x64 > OK > Apply
- Folgende Applications hinzufügen:
- INSTALL – Microsoft Visual C++ 2005 SP1 x86 x64
- INSTALL – Microsoft Visual C++ 2008 SP1 x86 x64
- INSTALL – Microsoft Visual C++ 2010 SP1 x86 x64
- INSTALL – Microsoft Visual C++ 2012 x86 x64
- INSTALL – Microsoft Visual C++ 2013 x86 x64
- INSTALL – Microsoft Visual C++ 2015 x86 x64
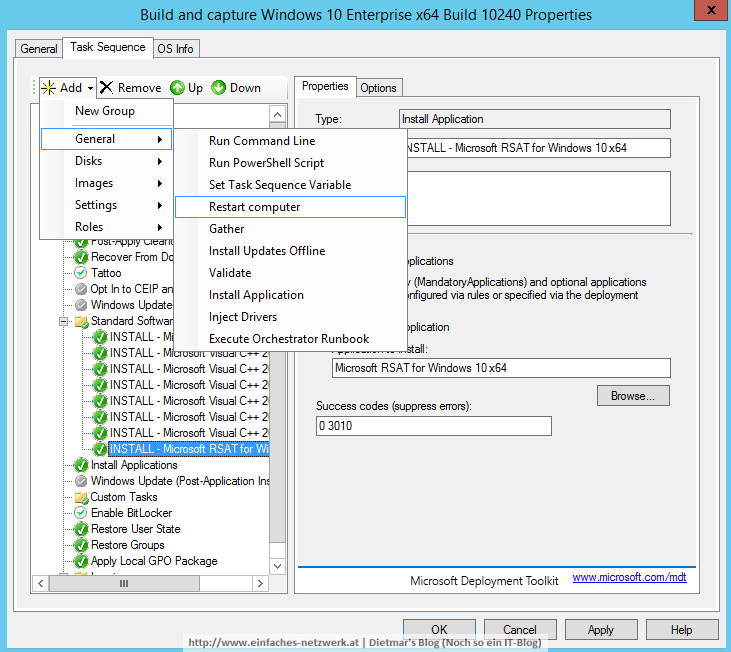
- INSTALL – Microsoft RSAT for Windows 10 x64
- INSTALL – Microsoft RSAT for Windows 10 x64 markieren > Add > General > Restart computer > Apply
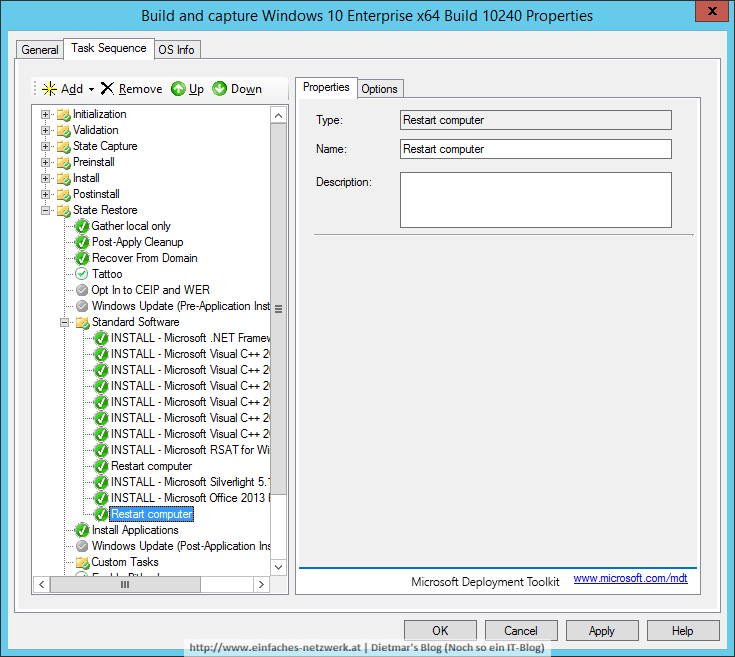
- Nach Restart computer folgende Applications hinzufügen:
- INSTALL – Microsoft Silverlight 5.1 x64
- INSTALL – Microsoft Office 2013 Pro Plus x86
- Restart computer hinzufügen
- Windows Update (Pre-Application Installation) markieren
- Auf den Reiter Options wechseln
- Häkchen bei Disable this step entfernen > Apply
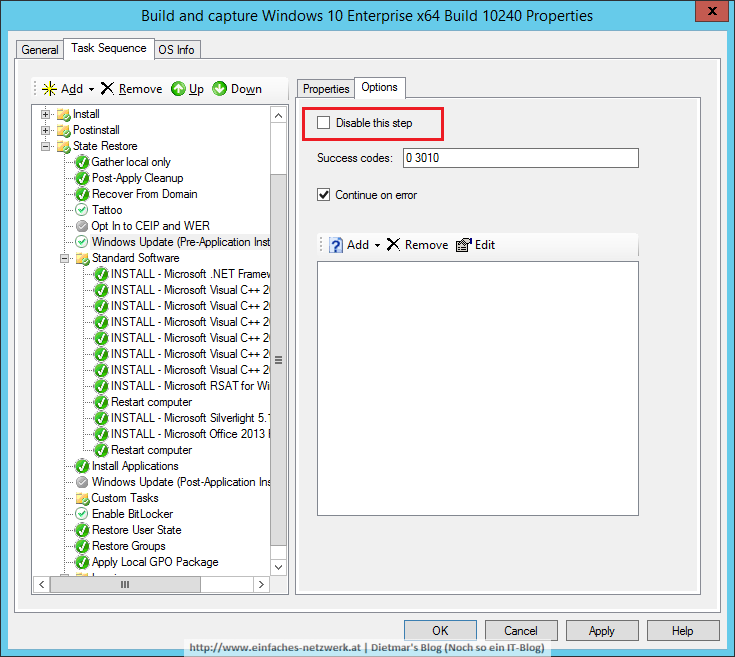
- Windows Update (Post-Application Installation) markieren
- Auf den Reiter Options wechseln
- Häkchen bei Disable this step entfernen > Apply
- Den Ordner Custom Tasks markieren > Add > General > Run Command Line
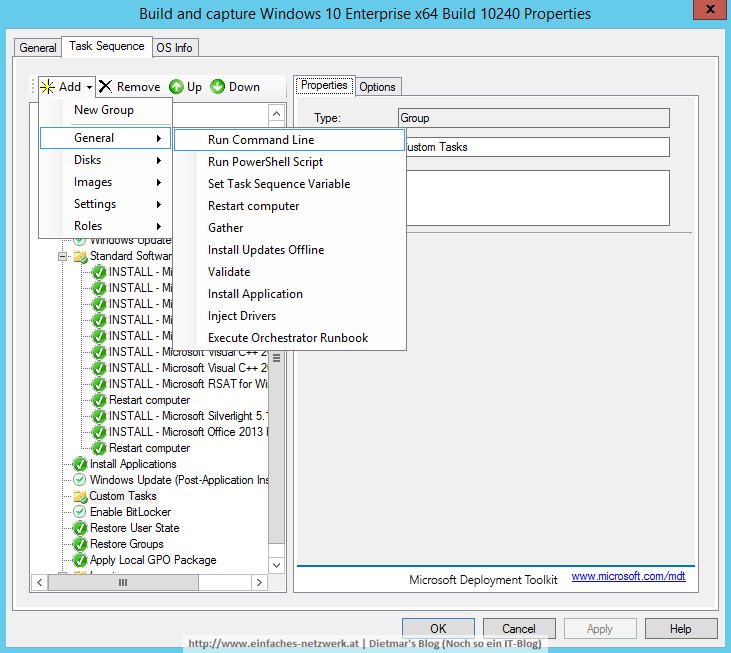
- Run Command Line
- Name: CONFIG – Cleanup before Sysprep
- Command line:
CMD.exe /C DISM.exe /Online /Cleanup-Image /StartComponentCleanup /ResetBase
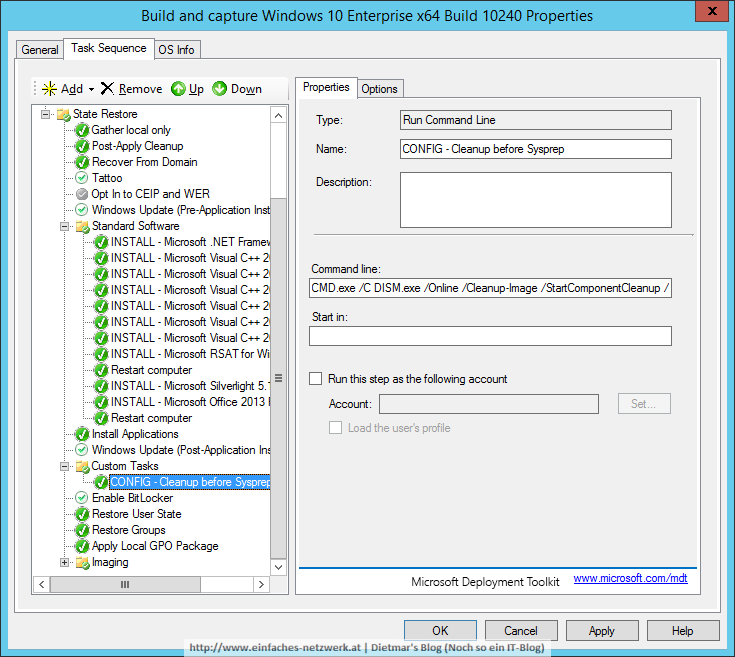
- Apply
Hinweis: Das Bearbeiten der Antwortdatei Unattend.xml mit WSIM beschädigt das Deployment. Ich werde diesen Artikel updaten, wenn dieser Bug behoben wurde.